Help
Topics
Navigation

Navigation menu before login
Introduction
An introduction to Radio Broadcast Content Management System (CMS).
Help
The page you are currently viewing.
Feedback
A form where you can submit your comments and experiences using the Radio Broadcast
CMS
Credits
A list of the key contributors and the development team for Radio Broadcast
CMS.
Login/logout
Click on the login button to access Radio Broadcast CMS.
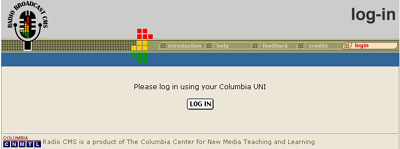
Login
This will take you to the AcIS Login page. Use your University Network ID (UNI)
and password to login.
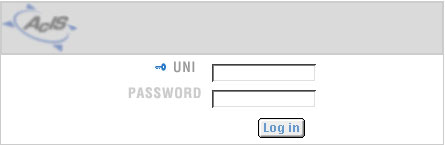
AcIS login page
If you are having troubling logging in please contact the AcIS Help Desk: (212)
854-1919 or consultant@columbia.edu.
When you are finished using the system be sure to logout by clicking the
logout button ( )located
at top right-hand side of the Radio Broadcast CMS interface. )located
at top right-hand side of the Radio Broadcast CMS interface.
Your profile
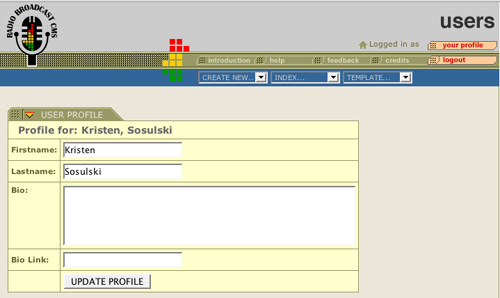
User profile page
To update your student profile click on your profile button ( )
in the upper right corner of your screen. )
in the upper right corner of your screen.
User profile: The following information can be added to your student
user profile:
- Full Name
- Bio
- Bio Link: A web site url to your biography
When you are done modifying your profile click UPDATE PROFILE. The information
in the user profile will be attached to any story written by a student and published
as a broadcast.
[ Back to Top ]
Your stories and broadcasts
After login you will arrive at the main page. This is your personal page for
the Radio Broadcast CMS. Here you can view the stories that you have worked
on and all of the broadcasts on which you are either an executive producer or webcaster.
You can return to the main page by clicking your user name next to Logged
in as (  ). ).
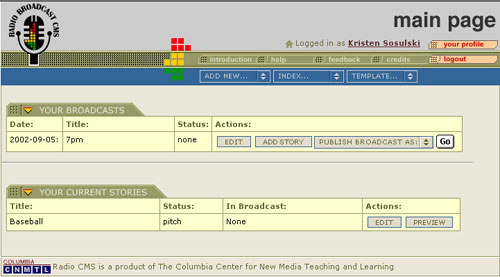
Main page after you login
Creating a story
Add a new story by clicking on the drop down menu in the navigation bar labeled Create New...(
 ) and select
the option for Story. ) and select
the option for Story.
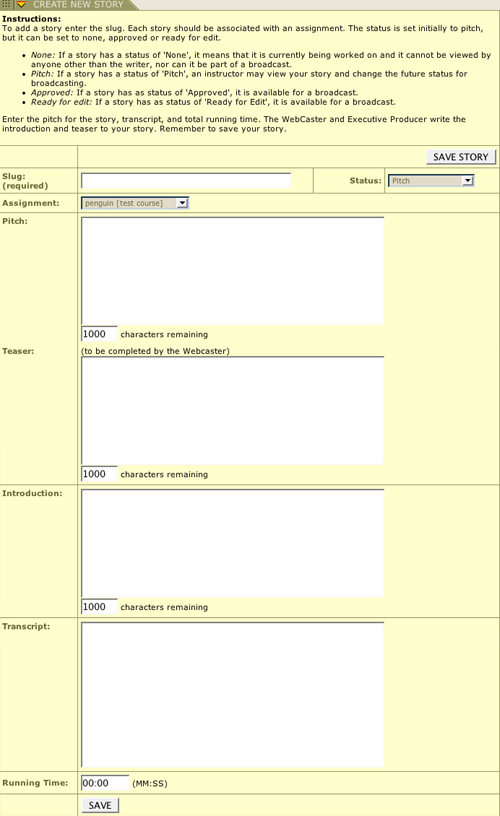
Create story page
When creating a story the following elements can be included:
- Slug: The identifier for your story.
- Status: Refers to the story status. The following options are available for a story's status:
- None: If a story has a status of 'None', it means that it is currently being worked
on and it cannot be viewed by anyone other than the writer, nor can it be part of a broadcast.
- Pitch: If a story has a status of 'Pitch', an instructor may view your
story and change the future status for broadcasting.
- Approved: If a story has as status of 'Approved', it is available for
a broadcast.
- Ready for edit: If a story has as status of 'Ready for Edit', it is available
for a a broadcast.
Note: Status can initially be changed from 'None' to 'Pitch'. When a story has been pitched, the status can then be changed from 'Pitch' to 'Approved'
or 'Ready for Edit'. A story's status cannot be changed form from 'None' to 'Ready for Edit' or 'Approved', and can only
be part of a broadcast if the status is 'Approved' or 'Ready for Edit'. A student
or an instructor can change the status of a story in the CMS.
- Assignment: This defines what kind of assignment the student is completing
for the course (identified by letter, a,b,c,d,e,f,g,h ).
- Pitch: This is an internal feature, so students can communicate with the
instructor about story ideas. For example: "I want to write a story about
septuagenarian bicyclists."
- Teaser: This is the part published underneath the headline, written by the
reporter and edited by the web producer. This describes, or "sells" the story so listeners will want to click on it and listen to it. For example: "These
bicyclists may be as old as the hills, but the New York-based group 'Geezers
on Wheels' can outrace anyone, including our reporter, Jenny Smithson."
This is written by the webcaster or student.
- Introduction: This is added by the webcaster to each story
- Transcript: This is the full text of a story.
- Running Time: Total time of a story in minutes and seconds ( MM:SS format).
To save your story click on SAVE STORY at the bottom of the page.
[ Back to Top ]
Editing and deleting a story
Edit an existing story from the main page. By viewing under your current stories click
the edit button ( )
that appears next the story you want to edit. To save your story, click on SAVE
STORY at the bottom of the page. )
that appears next the story you want to edit. To save your story, click on SAVE
STORY at the bottom of the page.
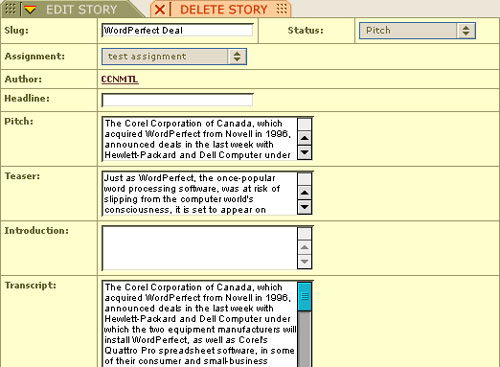
Edit/delete story window
A student can not delete a story if it is part of an existing broadcast. An
instructor, web or executive producer have access to edit a reporter's story. To delete
a story that is not part of an existing broadcast choose the DELETE THIS
STORY tab ( ).
The following warning message will appear. ).
The following warning message will appear.
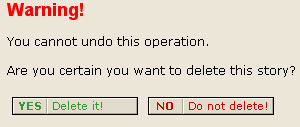
Delete story confirmation
Select YES Delete it! to delete the story or NO Do not delete!
to keep the story. You can not undo a deleted story.
Previewing a story
Preview an existing story from the main page under your current stories by
clicking the PREVIEW button ( )
that appears next the story you want to preview. This will give you a quick
view of your story. )
that appears next the story you want to preview. This will give you a quick
view of your story.
[ Back to Top ]
Your broadcasts
A student can edit a broadcast if he/she is assigned as a webcaster or executive
producer. A story can only be part of one broadcast.
On your main page, you will see the broadcasts that you are a part of if you
are a webcaster or executive producer.

Your broadcasts
For each broadcast the Broadcast Date, Title, Status and Actions are available.
Date: Refers to the date of the broadcast
Title: Refers to the title of the broadcasts. For the elections broadcast
this will most likely be the time of the broadcast.
Status: Refers to the state of the broadcast. If the broadcast is in
production and not ready to be published the status is set to None. That
status is changed to Pre, Live, and Post based on
the published state of the broadcast.
Actions:
- Edit: Allows the student to edit a broadcast and provide access to add or
delete stories from a broadcast. Each broadcast contains a title, date, and
cast. The cast consists of two hosts, executive producer, senior producer,
managing editor, board operator, studio producer, newscaster, webcasters,
and faculty advisors.
The drop down menus allow you to change the person assigned to a particular
role. The Title and Date can be modified by overwriting the existing text
in the fields. The stories for each broadcast are listed in the Stories
in this Broadcast section of the page. The selected checkbox indicates
that a story is associated with the broadcast. To disassociate a story from
a broadcast, uncheck the check box next to the story you want to remove.
Each story has a Story, Author, Headline, Teaser, Start Time, and Total Running
Time field. To edit the complete story click on the link next to Story.
This will take you to the story in an edit mode. To view information
about the author of the story click on the link next to Author. Be
sure to SAVE CHANGES before viewing the author or story information.
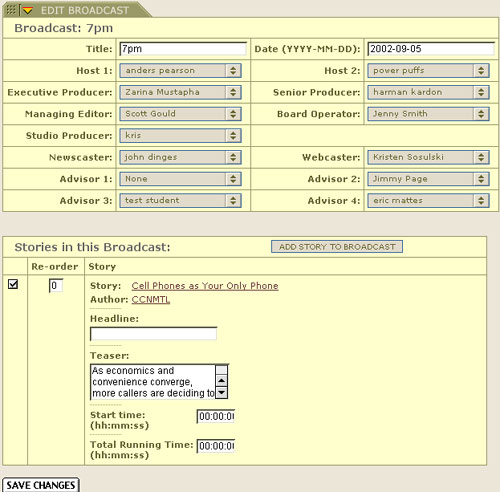
Edit broadcast screen
- Add story: This action enables the webcaster, executive producer,
or instructor to add stories to a broadcast. To add a story check the checkbox
under the [+] next to each story to be added. Only stories that are not part
of another broadcast and have a status of Approved or Ready for Edit will
appear. To save your changes, click ADD TO BROADCAST.
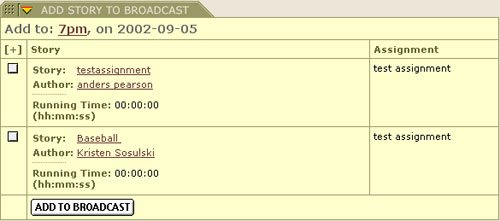
Add story to broadcast screen
- Publish Broadcast as:
- Pre: A broadcast should be published as Pre the day of the broadcast.
- Live: A broadcast should be published as Live while the broadcast is
on the air.
- Post: A broadcast should be published as Post after the broadcast has
been on the air.
- Click GO to publish the broadcast.
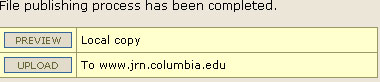
Confirmation Screen
After clicking GO to publish the broadcast, you have the option to
preview a local copy of the broadcast or upload the broadcast to the Journalism
School server.
- Preview Local Copy: This will give you a preview of what approximately
the broadcast will look like when it is uploaded to the Journalism server.
- Upload to www.jrn.columbia.edu: This will upload the broadcast files
to the Journalism server.
- View broadcast allows you to see the broadcast on the journalism
server.
Administrative
Navigation
Unlike students, administrators have access to all the areas of the Radio Broadcast CMS . Administrators can add new broadcasts, stories, users, courses and assignments. Additionally, administrators can view an index of all broadcasts,
stories,users, and publishing templates.

Navigation for Administrator
Create Broadcast
To create a broadcast go to CREATE NEW ()
and select Broadcast. Enter the broadcast title, broadcast date (in YYYY-MM-DD format),
the course the broadcast is associated with, and the broadcast's webcaster. Administrators must
create a broadcast for students to edit.
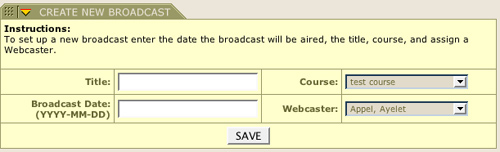
Create a broadcast screen
Create Story
See above
Create User (student or administrator)
To add a user go to CREATE NEW ()
and select User. To add the new user enter the full name of the user
and select the access level of admin or student. The student access level allows
students enter to stories into the system and edit broadcasts when they are assigned
privileges from a webcaster or instructor. Enter the UNI of the user and the
course he or she should be associated with . You can select more than one course
by clicking on the course and holding down the control or apple key. To save
your changes click CREATE USER.
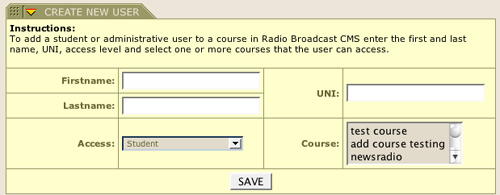
Create new user screen.
Creating an Assignment
To add an assignment go to CREATE NEW ()
and select Assignment. The purpose of the assignment section is to have
students identify their stories with particular assignments. Only one story
can be associated with one assignment. To add an assignment enter the assignment
name and select the course the assignment should be associated with. Click CREATE
to save your changes.
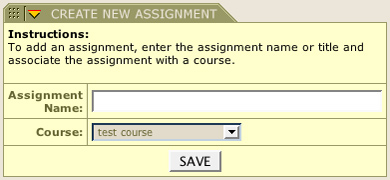
Create an assignment screen
Creating a Course
To add a course go to CREATE NEW ()
and select Course. Enter the course name and click add.
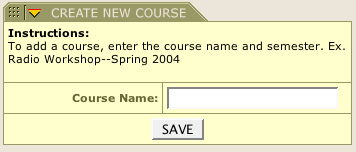
Create a course screen
Index of broadcasts
To view a list of all the broadcasts in the system go to INDEX ( )
and select Broadcast. This page has all of the functionality of the broadcast
pages described above. )
and select Broadcast. This page has all of the functionality of the broadcast
pages described above.
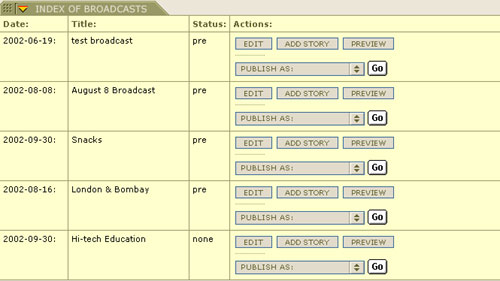
Index of broadcasts screen
Index of stories
To view a list of all the stories in the system go to INDEX ()
and select Stories. This list of stories has all the functionality as
described above.
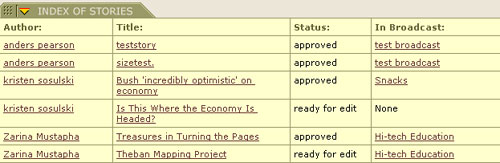
Index of stories screen
Index of users
To view a list of all the user in the system go to INDEX ()
and select Users. A list of all the users in the system will be displayed.
To edit or delete a user, click on the name of the user. To send email to a user, click on the email address of the user.
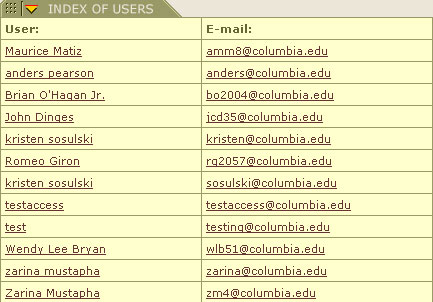
Index of users screen
Real Media publishing and archiving
Radio Broadcast CMS is formatted to publish your created and archived Real Media files. For correct publishing of your archived radio broadcasts, please be sure to name you file in YYYY-MM-DD.rm format to correspond with the date of the original broadcast (Ex.: 2002-09-24.rm).
[ Back to Top ]
Publishing templates
To view a list of all the publishing templates in the system go to TEMPLATE
(  )
and select Publishing. The templates are organized by course. (NOTE: Publishing templates should only be edited by CCNMTL staff.) )
and select Publishing. The templates are organized by course. (NOTE: Publishing templates should only be edited by CCNMTL staff.)
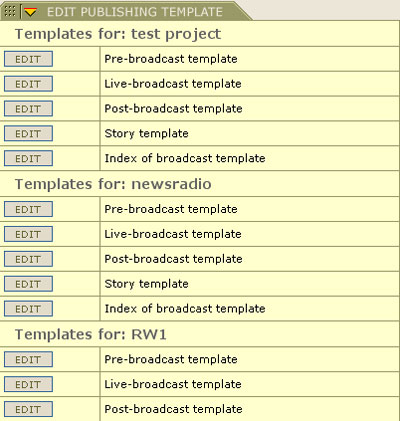
Edit publishing template screen
[ Back to Top ]
Systems Requirements
The following software, hardware, plug-ins and network connection are required
to experience this site:
1. 64 MB of RAM (128 recommended)
2. Monitor: 800x600 or higher resolution recommended
3. Browser: Internet Explorer 5 or later; Netscape 4 or later; or Mozilla 1 or later. Your browser must have JavaScript enabled.
4. Plug-ins: RealPlayer 7 or later. Download a free version of RealPlayer Basic if you do not already have it installed.
5. Network Connection: The recommended minimum connection is 56K modem with
throughput of 44 Kbps or more. A faster connection is strongly recommended.
Access to the Radio Broadcast CMS from on campus machine is ideal, institutional T1 helpful for some of the higher-resolution images.
6. Headphones: The final content in the Radio CMS requires you to listen to
audio.
[ Back to Top ]
Technical Support
For technical questions that are not covered in the system requirements, please
contact us by e-mail (ccnmtl@columbia.edu)
and we will respond to you as soon as possible.
[ Back to Top ]
|